Monday, August 15, 2011

Really, Really, Almost Done

We loaded the Tiki 8m onto the trailer tonight. We have really been over the boat and everything is now rigged and operationaly checked. We built some carbon fiber tillers around some pvc pipe.


We also worked on a new rudder shape for this boat.

Here  the rudders are rigged and pulled up. We used Dynex Dux for the rudder lashings.
This boat has a Humming bird sonar that scans to the side and is nomally transom hung. It now has a purchase rigged to hold it down or up.

We have installed a 50 watt solar panel on each house top.


Below is the nav station
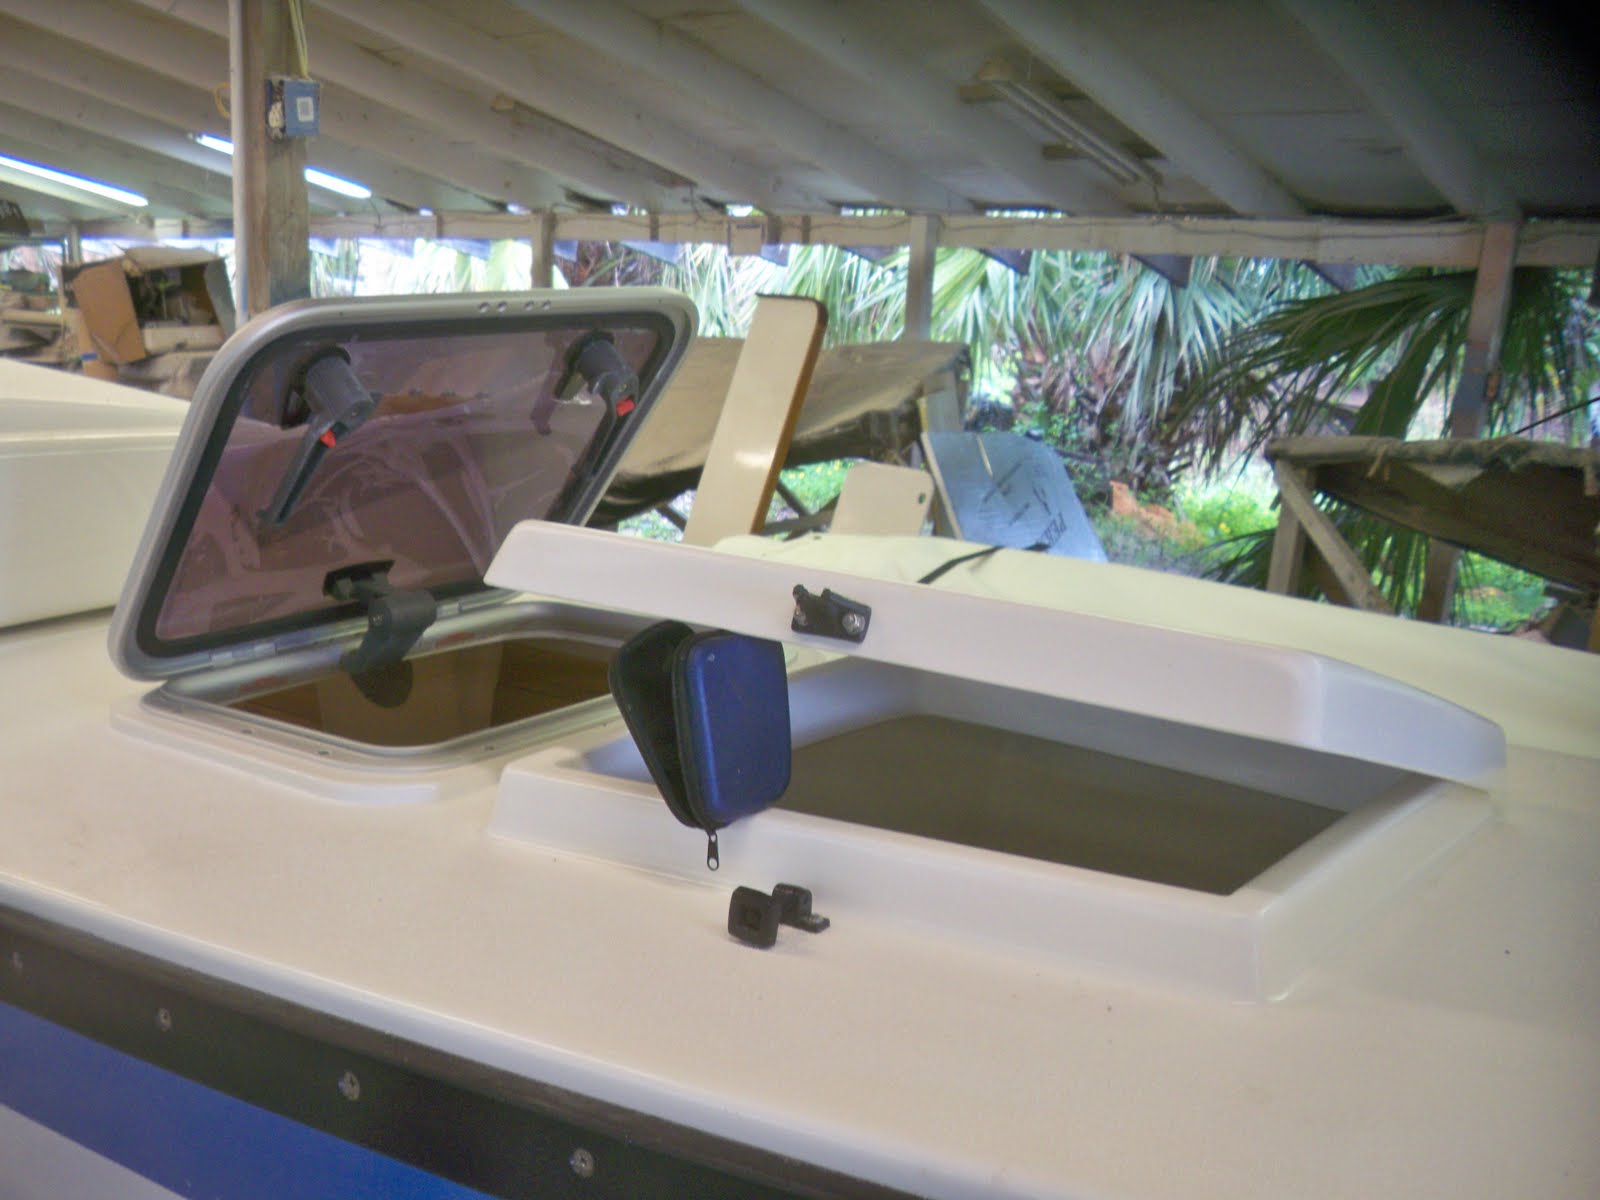
The lids over the engine and fuel tank have sticks fitted to support the lids in an open position.

This photo shows the wiring tubes and the bundle of wiring that goes to the cockpit and the other hull.
On the trailer, ready to load the rest of the parts and head off for assembly and launch.


Thursday, July 21, 2011

Wharrram Tiki 8m #4 Close to Launch

This boat has been back on the front burner for the last several weeks. We have moved forward a lot. The cockpit is almost finished. We have mounted all of the hardware and the engine and then we have potted for the fasteners. This prevents water from entering the laminate and prevents the bolts from crushing the core. This photo shows the cockpit before all of the hardware was installed.


The owner has decided to install a couple of Lewmar hatches at the forward end of the bunks. This will certainly improve ventilation. We added a frame of Coosa board to account for the deck crown.


       Here the hatch is installed. The Lewmar hatch is at the forward end of the main cabin and the glass hatch is in the forward lazzerette.


      Below we have added spacer blocks for the chainplates. These are of Coosa board as well. They will get blue paint before the chainplates are bolted on.


This photo shows the backing plate on the inside for the chain plates.

In the photo above you can see that the trim piece covering the hull to deck joint is installed. Below the blocks that the trim piece is attached to are visible. This trim is removable so that access to the rubrail bolts is easy.

Here the chainplates are installed.


The mast is mostly rigged and is being stepped to verify the chainplate location and shroud length.

Looking very boat like.


We have rigged this boat with synthetic rigging from Colligo Marine. I really like this system a lot and John Franta with Colligo is a very helpful fellow.

The plan is to finish this boat off this week and deliver her to Nassau next week.


Sunday, April 17, 2011

Forward Deck.Tramp, Supports, Sheer Stripe, Mast Paint

This is the beam at the aft end of the cockpit. Th section in the center is where the swim ladder will attach.
Visible at this end of beam is the slot that will receive the trampoline bolt rope.This is a piece of 1/2" PVC pipe that we glassed into the bottom corner of the beam and after fairing cut this slot. This technique has worked well for us on other projects.

 Here you can see the rail attached to the aft inboard end of hull to attach the trampoline. The blue stripe is just tape to layout the bolt holes on. Also visible is one of the mooring cleats.

The owner of this boat decided to go with a slatted teak deck instead of a trampoline.
Below we have fitted the deck to the fwd end of boat.
This photo shows the bottom side of the cockpit.We have cut pieces of PVC pipe to fabricate wire conduits between the two hulls and the motor. We will glue a matching stub of pipe to each hull aligned with the pipes on the cockpit and  connect the two with a piece of hose clamped on.


We have painted a blue sheer stripe on the hulls. I think that this is going to look very sharp.


Sunday, November 28, 2010

Beam Blocks and Cockpit

This photo shows the mounting cradles we have made to hold the aft tramp beam. This block will be attached to the deck with epoxy and then finished off with gelcoat to match the deck. You can also see the beam lashing pad glued to the deck flange. The bolts are just clamps for now. we will permanently install the bolts when we bond the decks to the hulls.The raw spot at the very end of the deck is where we have ground off a bit for rudder clearance. This will get a bit of gelcoat as well. Also visible are the rudder lashing holes.

 Here is the cockpit. This view is from the starboard side. We have changed the cockpit this time by making the seat "wings" removable. This will keep the width to 7' 6" and will facilitate easier storage in a shipping container. This owner plans to ship the boat to different locations with a dedicated container. The flanges that the seat wings will attach to are visible at each side of the cockpit.
 
 Here are the two companionway ladders.

 These boats will have the standard Wharram sliding companionway hatches.Here we have drilled the holes for the slide tube.
 A picture of the interior ceiling staving.
 These are the rudder heads. We again went with the kick-up rudders. The reasons are much easier tacking and much easier to un-ground. When you drive the boat up on a sand bar the skegs and rudder tend to dig in and make it much more difficult to back off. The rudder load is also minimized. These aren't quite as bulletproof  or as simple as the stock design but everything is a compromise.

 Here are the rudder blades. They are made of foam core and fiberglass and have lead weights in the bottom of the blade to make for easier operation.

Wednesday, October 6, 2010

Beam Blocks & Other Parts

This is the floor of the compartment where the black water tank will be installed.
The fwd compartments also get a floor . This creates flotation compartments below the floors at each end of the hull. We paint these areas with white elastomeric paint. This paint is tough and provides a good non-slip surface as well as not showing scratches. It is also easy to recoat in the future when required.
Here are the knees which are mounted below the mast beam. They reinforce the hull deck connection in this area.
We add a filler below the bunks to provide a smooth bottom instead of a vee shape.This area is also painted with the elastomeric paint,
The ends of the beams will receive cleats. These cleats will keep the beam lashings from sliding off the end of the beam and provide cleats for fenders and spring lines. We overbore for the mounting screws and back fill with thickened epoxy with chopped fiber.Sorry about the fuzzy photo.
We build our beam blocks out of Coosa board and cover them with glass fiber. Then we bond these to the deck. We bond these with epoxy for stronger secondary bonds and then fillet them in with polyester putty, paint them with gelcoat and sand and polish them out.
Next we take the blocks that will be glued to the bottom of the beams and fit them so that they are a little lees than flush with the deck blocks.


Next we align the hulls. We make sure they are parallel, square, and in the same plane. Then we strap the beams to the decks and hulls with the blocks in between coated with epoxy.


We space the blocks for just enough clearance allowing for gelcoat and paint.


Again after gluing with epoxy we fillet the blocks with poly putty and then fair and sand.


With the beam blocks installed we start the final fairing and prime for paint. We still have to pot for some rigging attachments.

These are the lashing cleats. They will be bonded and bolted through the hull to deck joint.

These strips with the holes are the hinge strips for the four deck hatches.They have been gelcoated and will get sanded and polished.
The companionway hatches have also been faired and gelcoated on the inside surface.

This is the start of the cockpit. It is built of Divinycell foam and fiberglass fabric.

Friday, September 17, 2010

Beams, Bulkheads, and Pans

The beams get flanges to support the cockpit as well as the aft end of the fwd deck. The client has decided to go with a slatted teak deck in lieu of the fwd trampoline on this boat. We are adding a flange to the fwd side of the mast beam for the deck here. The aft beam can be seen with some fairing putty on it to fill the weave and get it ready for paint.

The notch shown here is where we will glass in a fiberglass tube to receive the trampoline bolt rope. Once the beam is all faired off and ready for paint we will mill a slot through the glass and edge of the tube.

More fairing and sanding

More of the same. Here you can see the end of the tramp tube

In the hulls we are fitting the bulkheads and the pans. The pans are the fiberglass molding that becomes the cabin sole and the bunk top. They are foam cored as well to provide the required stiffness at a light weight.

The boards that you see across the top of the hull is to maintain the correct width of the hull while we install the bulkheads and the pans. The bulkheads are also of foam cored glass.

Both decks have now been fit to the hulls as well as the bulkheads. We won't attach them until we have completed the work on the interior of the hulls.

When we pull the decks out of the molds the windows and hatches all have to be cut out and the edges finished off with gelcoat. Her e we have done the cutting and sanding and have sprayed a coat of gelcoat on.

The same has been done here. The black paint is to aid in sanding the coamings fair.

Here is one companionway after the sanding and polishing.

One of the fwd hatch coamings completed.